Growing asparagus has been a rewarding endeavor for me, especially considering how expensive it can be in stores. I remember the first time I planted my own asparagus crowns, filled with excitement and just a touch of apprehension about nurturing such a unique perennial plant. The journey from planting to harvest has taught me so much, and I'm eager to share these insights with others passionate about sustainable gardening.
The Basics of Asparagus Cultivation
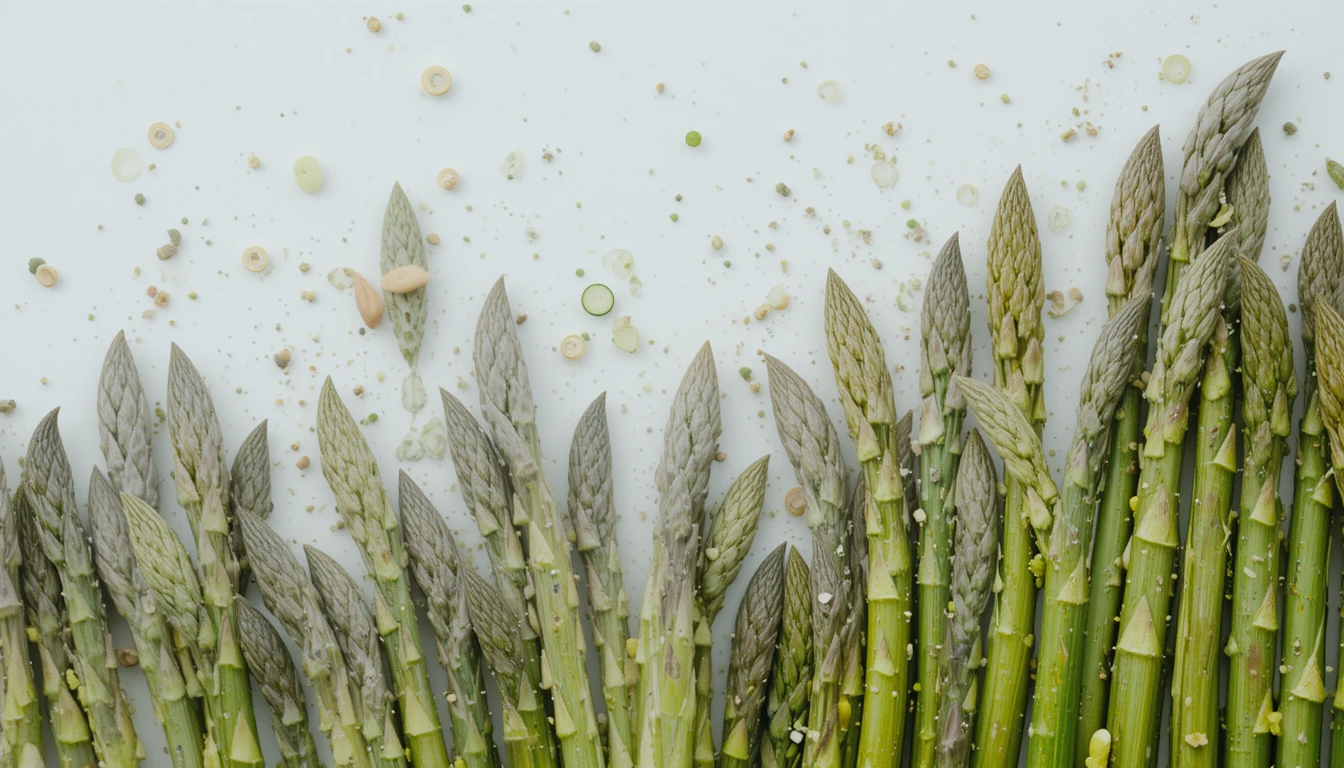
Asparagus is one of my favorite vegetables. It’s not just delicious; it’s a perennial vegetable, meaning it comes back year after year. This makes it a unique addition to any garden. But what does it mean to be perennial? Simply put, once you plant asparagus, it can produce for up to 20 years if you take good care of it. Isn’t that amazing?
Why Grow Your Own Asparagus?
Growing asparagus at home has numerous benefits. First, it saves money. Have you noticed how pricey asparagus can be at the store? By growing your own, you can avoid those high prices. Plus, homegrown asparagus tastes better. Freshly harvested spears are tender and full of flavor.
Another advantage is the satisfaction that comes from gardening. There’s something rewarding about nurturing plants and watching them thrive. As I often say,
"Asparagus is not just a crop; it's a commitment to your gardening journey."
It requires patience and effort, but the rewards are worth it.
Initial Considerations Before Planting
Before you dive into asparagus cultivation, there are some important factors to consider:
- Choose the Right Location: Asparagus loves the sun. Find a spot in your garden that receives plenty of sunlight. Good drainage is also crucial. If your soil is too wet, it can lead to root rot.
- Soil Preparation: Asparagus prefers fertile, well-drained soil. If your soil isn’t ideal, you might need to amend it. Adding well-rotted manure or compost can enhance its fertility. In cases of heavy, wet soil, incorporating sharp sand can improve drainage.
- Planting Depth and Spacing: When it’s time to plant, dig a trench about 10 inches deep. Space the crowns 18 inches apart to give them room to grow. This spacing is important for healthy development.
As I prepare my asparagus bed, I think about the long-term commitment. Once planted, these crowns will knit together, making it difficult to change the soil or remove weeds later. This highlights the importance of proper preparation.
Typically, I plant asparagus crowns in March or April. However, if you miss that window, autumn can also work. The key is to ensure the soil is ready and the crowns are properly placed.
With the right planning and care, your asparagus bed can be a source of fresh produce for many years. It’s not just about the harvest; it’s about the journey of growing something special in your garden. So, are you ready to start your asparagus adventure?
Preparing Your Asparagus Bed
Growing asparagus is a rewarding experience, but it requires careful preparation. If you want to enjoy fresh asparagus from your garden for years to come, you need to start with the right foundation. Let's dive into the essential steps for preparing your asparagus bed.
1. Steps for Correctly Preparing the Soil
First things first, you need to assess your soil. Is it well-drained? Fertile? If not, don’t worry. Preparing your soil can take about 2-3 weeks, but it’s worth it. Here’s how to get started:
- Clear the area of any weeds. A weed-free soil is a necessity for healthy asparagus growth.
- Dig a trench about ten inches deep and twelve inches wide. This will provide enough space for the asparagus crowns.
- At the bottom of the trench, add about three inches of well-rotted manure or compost. This enhances soil fertility and gives your plants a nutrient boost.
- Form a ridge with the displaced soil along the trench’s length. This ridge will support the roots and ensure good drainage.
Remember, once the crowns are planted, altering the soil becomes a challenge. So, take your time and do it right!
2. Choosing the Right Materials for Soil Improvement
Now that your trench is ready, let’s talk about materials. I always recommend using well-rotted manure or high-quality garden compost. These materials not only improve soil structure but also feed the plants in the coming years.
If you find your soil is particularly cold and wet, consider adding sharp sand or grit. This will help boost drainage, keeping your asparagus happy.
3. Timing Your Planting: March or Autumn
Timing is crucial. Asparagus can be planted in either March or autumn. I prefer early spring because the soil is warming up, and the plants can establish themselves before summer. However, planting in autumn is also a viable option.
When planting, space the asparagus crowns about eighteen inches apart. If you’re planting multiple rows, ensure they are spaced similarly. This allows the plants enough room to grow and thrive.
"Preparation is key when growing asparagus; take the time to do it right!"
Preparing your asparagus bed is a vital step in ensuring a successful harvest. By following these steps, you’ll set the stage for a fruitful growing season. Remember, with patience and care, you can enjoy fresh asparagus from your garden for many years to come.
The Planting Process
Planting asparagus is an exciting journey. It's a process that requires careful planning and execution. But don't worry! I'm here to guide you through it step-by-step.
Step-by-Step Guide to Planting Asparagus Crowns
- Choose the Right Spot: Look for a sunny area with fertile, well-drained soil. If your soil isn’t perfect, enrich it with well-rotted manure or compost.
- Dig the Trench: Create a trench that is 12 inches wide and 10 inches deep. This depth is crucial for the crowns to establish themselves.
- Add Nutrients: Fill the bottom of the trench with 3 inches of compost or well-rotted manure. This will feed your plants for years to come.
- Create the Ridge: Form a ridge along the length of the trench. This ridge will support the delicate roots of the asparagus crowns.
- Plant the Crowns: Lay the crowns on the ridge, spacing them about 18 inches apart. Remember, "Laying out your asparagus crowns with care leads to healthier plants!"
- Cover with Soil: Gently cover the crowns with 3 inches of soil. This will help protect them as they grow.
- Water Thoroughly: After planting, water the area well. This helps settle the soil around the roots.
Spacing and Laying Out Your Crowns
When laying out your crowns, spacing is key. I recommend keeping them at least 18 inches apart. This gives each plant enough room to grow. If you're planting multiple rows, ensure they are spaced similarly. This way, you'll avoid overcrowding, which can lead to poor growth.
Creating the Perfect Ridge for Root Support
Creating a ridge is essential for the health of your asparagus. This ridge should be firm enough to support the crowns but not too compacted. The roots need space to spread out and absorb nutrients. Make sure the top of the ridge is level with the surrounding soil. This will ensure good drainage, which is vital for asparagus.
After planting, don’t forget about watering. It’s crucial for soil settling. A well-watered bed helps the crowns establish themselves more quickly. Remember, asparagus is a long-term investment. Proper care now will yield delicious spears for many years to come.
In summary, planting asparagus requires attention to detail. From choosing the right location to ensuring proper spacing and ridge formation, each step is important. With a little patience and care, you'll be rewarded with a bountiful asparagus harvest!
Caring for Your Asparagus Plants
Asparagus is a delightful vegetable that can be a bit pricey at the store. That's why I love growing my own. It’s one of the few perennial vegetables, meaning it sticks around for years. But, caring for asparagus requires some effort up front. Once established, it can provide us with delicious spears for over twenty years!
Importance of Fertilizing in Early Spring
One of the most crucial steps in caring for asparagus is fertilization. I always make sure to fertilize in March. This early spring boost helps the plants get a strong start. Think of it like giving them a nutritious breakfast after a long winter. Using well-rotted manure or compost is ideal. It enriches the soil and supports healthy growth.
How to Harvest Without Damaging the Plants
Now, let’s talk about harvesting. It’s tempting to pick those spears as soon as they appear. But here’s a tip: resist the urge during the first year. This allows the plants to develop stronger roots. In the second year, when the spears reach about six inches, we can start harvesting. I cut them roughly two centimeters below ground level. You don’t need a special knife; a sharp kitchen knife works just fine. Regular checks are vital during the growing season. Asparagus grows quickly, and I find myself checking daily!
“Patience is a virtue when growing asparagus, but the wait is so worth it!”
Weeding Techniques and Irrigation Practices
Weeding is another essential part of asparagus care. I prefer to pull weeds by hand. Why? Because asparagus roots are shallow and can be easily damaged by hoes or other tools. Taking the time to hand weed protects those delicate roots and keeps the plants healthy. During dry spells, make sure to water your asparagus well. They don’t like dry feet!
Regular checks are essential. I keep an eye on the moisture level in the soil. If it feels dry, I give them a drink. A well-maintained asparagus bed can thrive with minimal fuss, but it does need our attention.
Asparagus Care for Wintertime
As we prepare for autumn, I cut back the yellowing foliage to ground level. A layer of mulch made from well-rotted manure protects the crowns during winter. This simple act not only safeguards them but also ensures a bountiful harvest in the spring.
Growing asparagus is rewarding. With the right care and a bit of patience, we can enjoy fresh, homegrown asparagus for many years to come.
Conclusion: Enjoying the Fruits of Your Labor
As we wrap up our journey into the world of asparagus, it’s time to reflect on the joys of harvesting this incredible vegetable. There’s something profoundly satisfying about cutting those fresh spears and bringing them to the dinner table.
“It's satisfying to see your hard work rewarded on the dinner table!”
This quote resonates deeply with anyone who has nurtured their own garden. So, how can we ensure we make the most of our asparagus harvest?
Harvesting Tips for Asparagus Spears
First, let’s talk about the best way to harvest asparagus. Timing is everything. The optimal harvest season runs from April to June. I recommend making your final cut by June 1. This ensures that the remaining spears can grow into healthy foliage, which is vital for next year’s yield. When harvesting, use a sharp knife to cut the spears about two centimeters below ground level. Yes, you can use a special asparagus knife, but any sharp knife will do the trick.
Post-Harvest Care and Preparing for Winter
After harvesting, it’s essential to care for your asparagus plants. Once the growing season ends and the foliage starts to yellow, cut the stems back to ground level. This simple act helps the plants conserve energy for the next growing season. Don’t forget to apply a layer of mulch, preferably well-rotted manure, around the crowns. This mulch acts as a protective blanket during the winter months, safeguarding the roots from harsh weather. Remember, mulching helps protect crowns during winter.
Looking Forward to Your Future Harvests
As the winter months roll in, it’s easy to feel a sense of loss as our gardens rest. But take heart! Every season brings new opportunities. By nurturing your asparagus bed and ensuring it’s well cared for, you’re setting the stage for another fruitful year. The anticipation of fresh asparagus in the spring is worth the wait. I can’t help but look forward to the delicious meals we’ll create from our homegrown spears.
Lastly, growing asparagus is not just about the immediate rewards of harvesting. It’s about the long-term commitment to nurturing these perennial plants. With the right care, we can enjoy the fruits of our labor for many years to come. So, stay tuned for future harvest seasons, and remember to nourish your asparagus for another fruitful year.
🌿👉 Unlock Your Garden's Potential: Click Here for Eco-Friendly Gardening Secrets
TL;DR: Establishing an asparagus bed requires initial effort but pays off in many years of delicious harvest. Carefully prepare the soil, be patient during the first growing seasons, and enjoy the rewards of home-grown asparagus.
Affiliate Disclaimer: This article may contain affiliate links. This means that if you click on a link and make a purchase, I may receive a small commission at no extra cost to you. I only recommend products and services that I believe in and that I think will be valuable to my readers.
AI Content Disclaimer: This article was partially assisted by AI writing tools. While AI was used to generate some of the text, all information and opinions expressed are those of the author.
.jpeg)
.jpeg)


Comments
Post a Comment